In this topic Hide
This help page explains how to search in RME. There are slight differences depending on where you are in the system:
• For RME core records, there is a basic search function and advanced search function for each module.
• Pages listing eForms for each area also have advanced search functionality, usually provided to administrators only.
• In both core records and eForms, lookups allow you to search for and select specific values already recorded in the system to complete a field.
Available for: RME core module search pages only
A basic search function displays on the RME core module search page (when you select the module header from the RME menu, such as Projects, Ethics, HDR > Student)
Basic search allows you to enter full or partial search terms in common fields for the module. For example, in the Projects module if you know the project code, enter it in the Project Code field.
To use basic search to find records, follow these steps:
1. In the Basic search tab, find the field/s you want to search by and enter your search criteria in those fields. Basic search is not case sensitive.
• You can use partial search queries. For example, to find a project with the term "Australia" in the title, you can just type "Aust" in the Project Title field.
• You can enter terms in more than one field to build a search query. Each field you define will be added to others you define. For example, if you want to find all records with a Project Type of Grant, a Project Status of On Hold and from a defined Primary Org Unit, you would complete all three fields. The search results will list all records that match all of these three criteria. It will not list records that only match one of these.
• If the field you want to search by a field that is not in Basic search, use Advanced search (below).
• If your institution uses record versions and you have the required access to see all versions (usually for administrators), use Advanced search to find earlier versions.
2. To start the search, press <Enter> on your keyboard, or select the Find button on the toolbar.
3. The current records that match your search criteria display automatically in the Results search tab. See: Open from search results
![]()
Click to view or hide: Example Basic search tab for the Projects module
Available for:
• RME module search pages to search for RME records by the following:
Fields not offered in basic search
Related items or other areas
The person that was created a record (Created User), or the most recent person to change it (Last Modified User)
• eForm RME administrators with the Allow Manage Applications page action assigned for a domain listing page, to search for all eForms in the domain
To search:
1. Click the Advanced search tab to open the advanced search panel.
2. Complete the fields using the table below as a guide. Advanced search is not case sensitive. You can search by text fields using full or partial criteria. For example, to search by the Person Name field to find a user with the name “Mr. John Henry Smith”, you can enter partial criteria with the Includes operator: John, John Smith, Joh, John H, John Smith Hen and so on. To find an exact match, you would enter the full name, "John Henry Smith" with the Equals To operator.
3. If you need to define more search criteria, add a new row by clicking the green cross +. The new line of criteria will add to the criteria you already defined in the first line, so the search will look for items that match both lines. Think of it as a kind of formula where each row defines an integral part of your search and these are added together. For ideas, see Example searches below.
4. Press <Enter> on your keyboard or click Find to start the search.
• Search results display automatically in the Results tab. eForms that are in progress show by default. To include completed eForms as well, tick the Show all applications checkbox.
• If you want to use the same search criteria another time, save your search.
• If your search query is unsuccessful, you may need to redefine your criteria. To remove a line of criteria, select the red cross X in front of it.
• For core records, to remove search criteria so you can enter new criteria, click Clear.
Search field |
Description |
||||||||||||||||||||||||
Including/Excluding slider |
Use this slider to indicate if you want to find items that include the details you will define in the following fields (Including), or find all those that do not include these details (Excluding) |
||||||||||||||||||||||||
Area |
Functionality area of the system you want to search, for example a module (related domain for eForms), related items or other module records
|
||||||||||||||||||||||||
Search On |
The specific data or field to match in the search; the options in the dropdown are dynamically populated based on what you selected in the Area field |
||||||||||||||||||||||||
Operator |
Defines how you want to search with the following Value field. Options are dynamic and depend on the domain and what is selected in the search fields above. Options may include:
|
||||||||||||||||||||||||
Value |
The value you want to find in your search (or exclude from results, if using Excluding or Not Equal To options) Depending on what you select in the Operator field above, you may be able to define further search criteria. Example: If you are looking for a core record with the word “person” in the description, select Description from the Search on field, enter “person” in the Value field and leave the other fields as they are. |
![]()
Click to view or hide: Advanced search walkthrough
The results of your search query display in the Results page. To open an record or eForm, you can either:
• Select the
Open icon ![]() in the grid next to the item. The record or eForm opens in the same browser
tab, replacing the search page.
in the grid next to the item. The record or eForm opens in the same browser
tab, replacing the search page.
Alternatively, you can right-click the Open
icon and choose to open the item in a new browser tab. In this way, you
can have more than one item open at a time.
• Tick the checkbox
to the left of the record in the grid so it is ticked. Go to the toolbar
and click Open. The record or
eForm will open in the same browser tab.
You can select more than one
record or eForm at a time using this method so that they open in separate
browser tabs provided that your browser is set to allow popups. If only
one item opens in a new tab, check your browser settings.
• If you have multiple eForms open, concurrent checking will prevent your changes from being overwritten. For details, see: Saving and multiple user checking.
If you have been assigned with the Allow Bulk Navigation page action for the page, you will be able to view each record from search results in succession by using the Previous/Next or Previous eForm/Next eForm options. You will be able to view all records or eForms related to the displayed page or from search results.
The footer in the search Results page includes the following information about the results:
• Page Size: The
number of rows that has been set to show in the results grid (this may
be customised for your institution)
You can change this to show more rows by selecting another number, such
as 50. To display less, choose a smaller number.
• The number of pages of results, and the current page displayed, for example, Page 1 of 5
• A count of the total number of records identified for the search, shown in brackets after page numbers, for example, Page 1 of 5 (50 items)
• Individual page numbers for navigation, allowing you to jump to a specific page of results
![]()
Click to view or hide: Example search results footer
If you want to use an advanced search query another time, you can save it so you don't have to enter the criteria again. Searches are saved for each page, separately. You can even set it so that people with other roles can use it.
To save an advanced search:
In the Advanced search tab on a page, complete the search criteria. Click the green plus icon (+) to add a new line of search criteria if needed.
In the toolbar across the top of the page, click Save. The Save Search popup displays with fields to complete.
Enter a distinctive name to help you identify it, and describe what the search does.
If
you want others to be able to use the search, select the role/s from
the Allow roles to view this search
dropdown.
If you want others to be able to change this search, select the role/s
from the Allow roles to modify this
search dropdown. With this setting, users with the defined
role/s are automatically granted access to view the saved search so
they can modify it.
The Current? column in the
lookup indicates whether the role is currently active or inactive.
Only select active roles. If a role is inactive, the search will not
be shared with any user with that role. Click the column header to
sort in descending or ascending order, or you can click the option
in the first row to display All roles
(default), current (Yes) or
non-current (No).
Click OK. This search will display for selection in the Saved Search dropdown to the right of the Advanced search tab for the page. If you have been assigned the Manage Saved Searches Page View USE019, accessed from the Session menu (username, at the top right above the toolbar), searches you can view and modify are listed. Fields in step 4 above only display if your role has been given access to modify it.
You can delete or rename your saved searches in the Manage Saved Searches page.
Dropdowns are fields with an arrow that you click to display a list of options to select. The lists in each dropdown is linked to a category which RME administrators set up and maintain. Some category items are system categories and these cannot be modified.
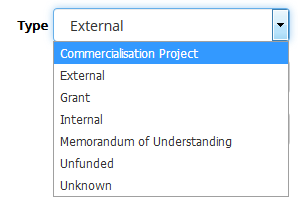
Example dropdown
Lookups are fields that allow you to search for and select specific values already recorded in the system to complete a field.
By default, columns in a lookup are sorted by the first column of data from the left in ascending order, numerically then alphabetically (1 to 10+, then A to Z). An Up arrow indicates that the sort order is ascending, smallest to largest. For alpha-numeric values, numbers take precedence, for example: A1, Aardvark, Abacus … and so on.
Clicking the column header changes to the opposite order, in this case, descending (10+ to 1, then Z to A). The Down arrow indicates that the sort order is descending, largest to smallest.
To change the column you want the lookup sorted by, click another column header. You can only sort by one column at a time.
Lookups differ slightly for core records, eForm fields, and eForm grids. See the relevant sections below.
In a core record, if a field is a lookup to search for and select a value, follow these steps.
1. Click in the field, or the down arrow at the end of the field. A search popup displays.
2. If you know the exact code or value, you can enter it directly in the field and press the <Enter> or <Tab> key to add it. This only works if the exact code is entered. Go to step 6.
3. If a default search query is defined for the field, results will be displayed in a grid. You can also enter a different search query, as you would for an Advanced search, then click Search. To remove all existing search criteria to start a new search, click the Clear button.
4. From the search results, click the relevant row to add the value to the field. Some fields may allow you to select more than one. To view more results or adjust the grid size, use the controls in the grid footer.
5. If the Create button displays and you are able to click it, you can add a new item if you couldn't find it by searching. You may need to try at least one search for this button to be enabled. As an example, say you enter search criteria to look for a person and cannot find them. The Create button will be enabled after the search and you can add the person to RME to create a new personnel record. This requires special permissions.
6. In the toolbar, click Save.
![]()
Click to view or hide: Example core record lookup search
In an eForm, if a field has a lookup to search for and select a value, follow these steps:
1. Click the field, or the down arrow at the end of the field, to display a search panel. Alternatively, if using the <Tab> key for navigation, press the down arrow key to open the lookup when the field is selected. To close an open lookup, click the <Esc> key.
2. There are few ways to search for a value:
• Keyword: Click in the field and enter a full or partial keyword. Matching search results appear as you type, with the keyword highlighted.
• Select from the list of items already displayed in the results grid if a default search is defined for the field. To view more results or adjust the grid size, use the controls in the grid footer.
• Use a filter to search by a specific value, such as Organisation, Org. Unit (administrative organisational unit or AOU for short), Administrative Unit (Admin or Managing unit, a parent org. unit for child org. units - see: Org. Unit Relationships), Classification or Type. When you select a filter, a popup displays to allow you to select from a list of values to filter the list by. Different filters are offered in each lookup; some don't have any filters.
• Filter a column in the search results grid. In the column you want to search, click the magnifying glass Search icon. Select the type of search you want to use (operator) using the table below as a guide. Enter the search term in the search field for the column. The column will list all items that match the search.
3. To select
an item from search results, click the item row to add it to the field.
If the field allows more than one item, you can select other items.
If there is only one item in the search results, you can just press the
<Enter> key to select it
and add it the field.
4. Details may display for each item you selected, for you to enter required details. For example, if adding a fund source, you may need to enter the dates of involvement. Complete the required information and click OK to save and add each item.
eForm lookup search type |
Operator description |
Contains |
Finds items that include a partial or full term |
Does not contain |
Finds all items that do not include a partial or full term |
Starts with |
Finds items that begin with a defined letter or prefix |
Ends with |
Finds items with a defined letter or suffix at the end |
Equals |
Finds items that exactly match the search term |
Does not equal |
Finds all items that do not exactly match the search term |
Reset |
Clears the lookup search text box |
Click to view or hide: Examples of using an eForm lookup
eForms sometimes include grids for lists of multiple items, such as people (investigators, assessors, examiners), animals, subjects, fund schemes, facilities and so on.
If the Add button is displayed, you can add an item to the grid.
![]()
Click to view or hide: Example eForm grid
When adding a new grid item, a lookup may be displayed in a popup. To use this lookup, follow these steps:
1. In the lookup, either:
• Enter a full or partial search term to find matching items in the list.
• Select from the list of items already displayed. As for the eForm lookup above, you can search each column in the list to find items.
2. Click the row to select each item you want to add. Selected items display under a header: x items selected. To view more results or adjust the grid size, use the controls in the grid footer.
3. To start adding the items to the grid, click the Add Selected button. Before the items are added, the details for each will display within the RIC so fields can be reviewed and/or completed.
4. Complete relevant fields for each item and click OK. The selected items are added to the RIC grid.
Click to view or hide: Example lookup for an eForm grid
A: If you want to find all projects in the Projects module with "biology" in the title, you would use the following search criteria:
|
Area |
Search On |
Operator |
Value |
Including |
Projects |
Project Title |
Includes |
biology |
B: Search by Administrative Unit (AOU) for a more hierarchical search:
|
Area |
Search On |
Operator |
Value |
Including |
Org. Units |
Org. Unit Name |
Includes |
Name of the org. unit |
You could also do the same with the org. unit code if you know it.
C: To find all the records for a person where they are both the Chief Investigator and have linked journal articles from the Research Outputs module, you create a multi-line search query.
In this example, you want to see records that match all of these, but not records that only include one of them:
|
Area |
Search On |
Operator |
Value |
Including |
Investigators |
Preferred Full Name |
Includes |
Robin White |
Including |
Investigators |
Position |
Equal To |
Chief Investigator |
Including |
Research Outputs |
Category |
Equal To |
Journal Article |
D: In HDRCM eForms, for the Research Study Plan and Review template category, you can find all outstanding eForms, that is, those sent to students but not yet completed.
Create a combined Advanced search to look for eForms based on the Research Study Plan and Review template category that are not in an end workflow state. If you use sessions, you can also include search criteria to limit results to the current session (based on eForms with the Year and Session that matches the session marked as Current in the HDR configuration page).
|
Area |
Search On |
Operator |
Value |
Including |
Manage HDR eForms |
eForm Category |
Equal To |
Research Study Plan and Review |
Including |
Manage HDR eForms |
Workflow Complete? |
Equal To |
No |
Including |
Manage HDR eForms |
Current Session? |
Equal To |
Yes |
ID: Search_RME.htm