In this topic Hide
This help page explains how to use the different features in an open eForm.
You can copy the address (URL) for an eForm from the browser Address field as a link and save it as a type of "bookmark" so you can quickly open it, or send it to someone else. When the link is clicked, the eForm will open in the page that was displayed when you copied the URL. Others will only be able to view the form when they successfully logged into RME and if they have the relevant permissions to view the eForm otherwise access will be denied.
To do this, go to the top of your browser window and copy the entire address shown, for example: http://myuni.com.au/RME/app/eform/100023456/page/100006789. This link includes the unique application eForm identifier, and the specific page of the form if it's not the first page.
In the page tree on the left of an eForm, icons display at the right of each page to indicate if comments have been made in that page and what type.
For details, see: Comments
If your institution uses the Costing and Pricing Tool, specific fields designed for use with the tool can be included in Research Project Request (RPR) eForms.
Field (default label) |
Description |
Consumable and Capital Items (may be re-labelled, for example, as Non-Salary Items) |
This field control lists the consumable and capital items for the project in an eForm based on the applicable funding rule/s. You can select the items that are relevant to your project and enter a total amount per item in an Amount field. Only enter numeric values; if you enter text, it will not be saved. If the amount is unknown at the time of completing the eForm, you can enter 0 (zero) and update it in the eForm at a later stage. Selected items and entered amounts are automatically reflected in CPT. See: Consumable and Capital Items in CPT |
Costing Status |
This field displays the Costing Status from CPT, which can be one of the following: • New - No calculation has been done • In-Progress - Costing is under
way and is not yet complete • Valid - The costing has been successfully calculated Changes to project inputs or rules may impact costing details in the tool and cost and price calculations if the Costing Status is either In-Progress or Valid at the time of the change. In an eForm, if any pages have been impacted, the Costing Status will be In-Progress. Alerts will only display when this status is Valid. |
Funding Summary |
Prerequisite: Funding details only display when Start Date and End Date fields are completed. This is a read-only summary table to view funding details per fund scheme. It is populated when the Update Funding Amounts activity is executed in the workflow. The table includes the following columns: • Fund Scheme • Organisation • For each year of the project: Applied Amount, Applied In-kind Commitment, Awarded Amount, Committed In-kind • Totals: Applied Amount, Applied In-kind Commitment, Awarded Amount, Committed In-kind If using the RME ARC Grants Integration to populate RPR eForms for grant proposals (pre-award) or projects (post-award), please note ARC does not provide data for the project Start Date and End Date fields. The service will populate these fields based on the budget years for ARC data, where the year of the import is taken as the starting year. For example, if the integration is run in 2023 for a three-year project, the budget years will be 2023 (year 1), 2024 (year 2) and 2025 (year 3). The project Start Date will be populated as 01/01/2023. The End Date will be populated as 01/01/2025. For details about ARC Grants Integration, refer to the RME ARC Grants Integration Guide. |
Institution Cash Contribution |
This field displays the Total Cash Contributions value from the Institution Cash and In-kind Contributions page in CPT, which is the total of cash contributions provided by internal fund schemes and/or the institution (indicated by the institution abbreviation) including facility costs and consumable and capital item costs assigned to the institution. |
Institution In-kind Contribution |
This field displays the Total In-kind Contributions value from the Institution Cash and In-kind Contributions page in CPT, which is the total of in-kind contributions provided by internal fund schemes and/or the institution (indicated by the institution abbreviation) including facility costs and consumable and capital item costs assigned to the institution. |
Staying at the Institution |
Funding that will remain at the institution (total of all contributions provided by external fund scheme minus a) salary of externals, b) any cash consumable and capital item amounts for items within a group identified as outward expenses (sub-contract work), and c) disbursements to external organisations. |
Total Contribution by the Institute |
This field displays the Total Cash and In-kind Contributions value from the Institution Cash and In-kind Contributions page in CPT, which is the total of cash and in-kind contributions by internal fund schemes and/or the institution. |
Total Cost |
This field displays the Direct Cost value (without GST) shown on the Totals panel and Project Cost page in CPT. |
Total Price |
This field displays the Total Price value (without GST) from the Project Price page in CPT, which is a total of all cash and in-kind contributions by all external fund schemes. |
Total Project Amount |
This field is used to display the total value of the project when the institution is not the lead or administering institution, for information and reporting purposes. If the global label for Project is customised, this field label will reflect the customisation. For example, if the Project global label is changed to Grant, the label will be Total Grant Amount. This field is not pushed to a core record. Data remains in the eForm. |
Total Project Amount: Cash (excl. GST) and In-kind |
This field displays the Total Project Amount: Cash (excl. GST) and In-kind value from the Project Price page in CPT. |
Update
from CPT |
Prerequisite: CPT Configuration > Bypass validation for Consumable and Capital Items in CPT? is Yes Displays when consumable and capital item amounts are changed in CPT and no longer equal eForm amounts Used to update the eForm with consumable and capital item amounts from CPT When clicked, the amounts will be in sync. When confirmation messages are cleared, validation indicators are removed, and the Costing Status becomes Valid. |
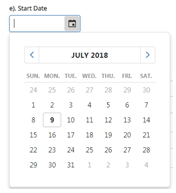
You use a date picker to select a date for a date field. Click the field and a calendar displays. To change the month, click the arrows either side of it. Click the desired date to populate the field.
You may be able to delete an eForm at particular stages of the workflow where the Delete activity has been configured. If so, a Delete (or similar label) action button will display in the Toolbar panel on the right of an open eForm. For example, the Delete activity may be configured for a ‘Draft ‘workflow stage so the researcher can delete any of their own eForms while drafting.
As an alternative for those with permissions to delete multiple eForms (usually RME administrators), a Delete button may be provided in the page toolbar for eForm listing pages (Manage Applications page action). See: Delete a record or eForm.
Once an eForm is deleted it is removed from the database completely and therefore is no longer visible in either RME eForms or its corresponding RME module.
The Delete icon will be inactive and greyed out for forms that do not meet the delete rules. You can only delete an eForm if it:
• Does not have a project linked to it
• Does not have an Approved status, or similar category item such as Accepted or Clearance Granted, depending on the module
• Is not linked to another eForm
To delete an form:
1. Click the Delete icon.
2. In the resulting Confirmation popup, click OK to proceed and delete the form. If you change your mind, click Cancel to keep the form.
Specific elements may be included in an eForm to allow you to provide document details or upload documents. Some are simple file upload elements.
For a grid (RIC), follow the steps below:
Task |
Steps |
Upload a document or add document details in a grid |
1. In the document grid, click Add to open the Add panel. 2. In the Document Type mandatory field, select the format for the document from the following options (one may be selected as a default or it may say "Please select" as a prompt); your selection dynamically displays other fields to upload a document or capture details: • Soft Copy: To upload an online file, such as a PDF or Word document via an upload control. • Path: To enter a path for the document location in your institution's system or other accessible location. • Hard Copy: To enter the document name of a hard-copy document and any comments about the location or access to it. 3. In the mandatory Name field, enter the document name. 4. Complete the details for the document based on the format selected in step 2. • If Soft
Copy, click Select file to browse and upload the file (it may
be possible to save without being uploaded if the element is not
set as Mandatory in the eForm design). File formats, such
as docx, pdf, csv or xlsx, are set by your administrators or eForm
designers. If you cannot upload a particular type of document,
contact your administrator for assistance. 5. In the Description field, enter an explanation for the document or any comments to help others locate or use it. 6. If there are other fields, complete them as required. 7. Click OK to close any open text entry fields, such as Description or Comments. 8. Click OK to save the document details and close the item details. If you change your mind, click Cancel to close the Add panel without saving. Notes: • The maximum file size and allowed file types are set in System Preferences. • If antivirus scanning is enabled in System Preferences, the file will only be uploaded if it passes the scan. • Sometimes, one or more documents are populated in a pre-defined list. If a pre-defined document is marked as Mandatory a document needs to be upload or details defined. A pre-defined document not marked as Mandatory does not need a value provided it is not edited in the eForm. |
Edit a document |
1. In the document grid, click the row (or
Expand icon 2. Click Open. The document details display in the Edit panel below the row. 3. Change the details. 4. If you want to upload a new soft copy document, go to the Reference (Document Title) field, and click x at the end of the field to remove the existing file. To upload the new file, click Select file to browse and upload, or drag and drop it into the area marked Drop file here. 5. Click OK to close any open text entry fields, then click OK again to save your changes and close the item details. If you change your mind, click Cancel to close the Edit panel without saving. |
Delete a document |
To delete the entire document
item, including all details and the linked document, go to the
last column of the row for the document item and click the Delete rubbish bin icon |
Click the arrow at the right to view a list of defined items you can select for the field.

Alternatively, if using the <Tab> key for navigation, press the <Enter> key to open the list when the field is selected. To go through items in a list, you can use the arrow keys.
To select one item in the list, press either the <Enter> or <Tab> keys. The list will close and the item added to the field.
To close an open list, click the <Esc> key.
The Email Application action in an eForm sends an email with the eForm, selected PDFs and/or any documents uploaded in the Linked Document RIC of the eForm. This option is only available if the Email Application workflow activity is incorporated into the eForm design.
1. Click the Email Application option in the Toolbar panel on the right (if available in the eForm you're using).
2. In the Recipient List section, enter or find the email recipient.
3. In the Document List section, select the document/s to attach to the email.
4. Select Send, or, if there are a few documents, select Zip and Send, to keep the overall document file size to a manageable level.
Various types of notifications can display on a eForm. Some provide information, for example, to let you know about the next steps of the process, some provide a warning to take care if an activity involves a risk, while some let you know if you left a mandatory question blank, or answered with details that are not correct.
A summary of questions that need addressing displays at the top of the page; click a question in this summary to go to the question that needs fixing. Questions with issues are also outlined in red with a specific message underneath each to tell you what to fix.
If you only enter partial data, save and then move away from the form page, messages may sometimes display at the top of the page. In some cases, you may not be able to save or go to another page until you answer certain questions. If you can move away fro the page, the details you entered will be saved. When you go back to the form, the page will be marked with the Invalid page status icon to alert you to go back to it and complete missing fields.
![]() Administrators: The background colour of these notifications can be changed.
Refer to the RME Installation Guide, Custom style sheets.
Administrators: The background colour of these notifications can be changed.
Refer to the RME Installation Guide, Custom style sheets.

Example: Page status indicators, message summary, highlight and messages for form issues
For grids in an eForm, used to list multiple items, when there is an error in one or more items, a To fix column is displayed. Items in error are moved to the top of the grid temporarily, and an icon displays for the row in the To fix column to help you identify the source of the issue. The only exception to this may be a Document RIC used to upload a document. The To Fix column may not always display; you need to check all the required fields for the type of document you are adding. See: Document upload above.
To rectify an issue, click the row to open the item details. Questions within the item that are in error are highlighted. Complete or change the details as required and click OK.
If there is more than one item in the grid that needs fixing, fix them one after another. Once you fix one item and save it, the error indicators for remaining items display so you fix the next one.

Click to view or hide: Example error message for a grid in an eForm
Once you finish your work in an eForm and save it, you can click either:
• Exit to close the form and return to the previous eForm list for the domain
• Home in navigation trail at the top of the page if you want to return to the RME Home page
• User menu (your name) > Log off to log out of the system entirely
Find and replace is offered in the text toolbar of editable fields of
more than one line. You can use this to find a term or phrase and replace
it with another. Editable fields display an Edit
icon when you mouse over them: ![]()
1. Click the field to display the full text box.
2. Click the
Find and replace icon ![]() and complete the fields
with a) the term or phrase you want to find, b) the term or phrase you
want to replace it.
and complete the fields
with a) the term or phrase you want to find, b) the term or phrase you
want to replace it.
3. You can replace
terms one by one, or all at once. To replace terms one by one, click either
the Replace single arrow icon
![]() . To replace all terms at once, click the Replace all multiple arrow icon
. To replace all terms at once, click the Replace all multiple arrow icon
![]() .
.
4. To close it, click the cross x at the end of the row.
![]()
Click to view or hide: Example of using find and replace
Some details in eForms are displayed in a grid. To view all the details of an item or edit it, you need to open it.
Task |
Description |
Open a grid item |
In the grid, click the row for
the item you want to view. Alternatively, you can click the Expand
icon If you open more than one item at a time, item details are displayed within the grid separately, labelled as "Edit xxxx". You can use the <Tab> key to go through all the fields of an item. To close the details for an item, click either OK (if you edited it) or Close. |
View amounts or numbers |
In some grids that are used to display amounts or numbers, such as fund scheme details for HDRCM eForms, fund source details for RPR eForms, or animal numbers for ethics eForms, some details may be displayed in a sub-grid. • To view funding amounts, click the Open link in the Fund Scheme Amounts column of the grid. The amount details display in a sub-grid. • To view animal number details, click the Open link in the Requested/Approved/Used Numbers column of the grid. The number details display in a sub-grid. To close a sub-grid, click the Close button at the bottom of the details sub-grid.
Example link to open a Fund Scheme Amounts sub-grid |
Add a new item |
Click the Add button. Depending on the type of grid, there are different options: • Fields display for completion. Click OK to save entered details. • A popup displays to allow you to search for and select an item. The popup includes a search field, a filtered grid of items defined for the field, and customised options for the field based on the eForm design. 1. Either enter a search term in the search field to find matches in the grid, or select directly from the grid. You can search each column in the grid to find an item. For more, see: Lookup. 2. To select an item, just click the item row. 3. Selected items display under a header: x item selected. 4. To add the items you selected to the eForm, click the Add Selected button. Before adding the items into the grid, details for each one will first be displayed so fields can be completed. 5. When fields are complete and saved, click OK. The selected items are added to the grid. |
Delete an item |
Go to the last column
of the row for the item and click the Delete
rubbish bin icon |
Show more rows in the grid |
You can increase or decrease the number of rows displayed in the grid by selecting the Page Size options at the bottom. You can choose to display 5 rows (default), 10 rows, or 25 rows in the grid. |
Sort grid items |
Grid items are sorted by the first column of data in ascending order by default. For details, see: Sort columns When you add a new item, it displays at the top of the grid until the eForm is saved. After validation, any items in the grid with errors will display at the top for visibility and will be denoted by an exclamation icon in the To Fix column. An error message displays below the grid to explain the issue. Once errors are addressed, grid items are re-sorted by the first column of data. |
View the next page in the grid |
Grids display a set number of rows by default. If there are more items than the set number of rows, there will be more than one page, indicated at the bottom as Page x of x. In the example below, this is displayed as Page 1 or 2. Next to this are the page numbers. Click a page number to view it. |
Resolve errors |
See: Grid error messages |
![]()
Click to view or hide: eForm Grid functions
Click the icon to display tips or information for the entire page, a specific question or a grid added to the eForm by RME administrators. The information displays in a blue box.

To close this, click either the Help icon again, or the X in the top right corner.
Lookup fields are those that allow you to search for and select specific values already recorded in the system to complete a field.
These differ slightly for eForm fields and eForm grids.
For details, see: Search - eForm lookup or Search - eForm grid lookup
A red asterisk indicates a mandatory question that must be answered for the form to be complete. If you miss completing a mandatory question, a validation error message at the top will alert you.
Sometimes, a validation error message may display when you create a new form before visiting the relevant page. This happens when details are pre-populated. For example, your personnel details may be added to the form automatically but there may be associated mandatory fields that need to be completed.

![]() The point at which all mandatory questions must be answered is determined
by the workflow rules applied when the form was designed. Generally, this
is on saving the form page but it could also be when submitting the form
for processing. Notifications will display at the top of the
form page to let you know what needs to be addressed before you can continue.
The point at which all mandatory questions must be answered is determined
by the workflow rules applied when the form was designed. Generally, this
is on saving the form page but it could also be when submitting the form
for processing. Notifications will display at the top of the
form page to let you know what needs to be addressed before you can continue.
When you open an eForm, the first available page is shown in the centre part of the screen by default (based on your role, access and permissions).
You enter details or answer questions in each page. Options include text fields, dates, dropdowns, radio buttons, checkboxes, and lookups. You may need to complete some questions in a page before you can move to another page or save.
When the system is saving or processing a selected action, a progress spinner displays briefly. You cannot select another action or page until the process is complete.
There are different ways to move through fields and pages in an eForm, outlined below.
Move through fields in a page
You can use your mouse to select fields in a form page.
Alternatively, you can use the <Tab> key to go through the fields and elements. To go back through fields, use <Tab + Shift>. The exceptions are dropdowns or lookup fields. You can tab to these fields to focus on them (edge is highlighted in blue), but you need to use different keys to interact with them, as follows:
• When the focus is
on a dropdown, press the <Enter>
key to open the list.
To go through items in a list, you can use the arrow keys.
To select one item in the list, press either the <Enter>
or <Tab> keys. The list
will close and the item added to the field.
• When the focus is on a lookup field, click the down arrow key to open the lookup.
• To close an open dropdown list or lookup, click the <Esc> key.
Move through eForm pages
To move through pages an eForm, you can use:
• Previous and Next web browser buttons
• Previous Page and Next
Page buttons at the bottom of
each page
The current page is saved when you do this so if a question requires an
answer, a notification will display. Some elements of the form may change
based on your saved answers, for example, some questions or even pages
may become hidden if they are not relevant to your responses. In this
case, if the next page becomes hidden, the next available page will
display or you may be returned to the first page.
• The Pages panel: Click on the desired page in the tree to open it
• The Toolbar panel on the right side: Select the action you want to take, such as Save, Submit Application or other relevant action based on your role and the stage of the form in the process
For some fields in an eForm, you can open a linked core record to see more details.
If a View Details link icon
![]() is displayed next to a field, such as Primary Contact, AOU
or Fund Scheme, you can click
it to open the corresponding core record in a new browser tab.
is displayed next to a field, such as Primary Contact, AOU
or Fund Scheme, you can click
it to open the corresponding core record in a new browser tab.
This icon only displays if you have been allocated with the Page View for the corresponding core page. If you have multiple Page Views allocated, the link will open the Page View which has the highest precedence.
Sometimes, even if the Page View is allocated, you may not be able to open to the record due to your defined data security access, such as Fund Scheme or Project Type Access Security. In this case, a message will display to inform you that you do not have the necessary permissions to view the linked record. RME administrators can assist by reviewing and changing data access security for your User record or role.
Icons that may display for an eForm page in the Pages panel on the left, to inform you about the status of the page:
Indicator |
Description |
|
All mandatory fields have been completed correctly. This will also display if you view a page with no mandatory questions, leave any or all fields blank, then move on. |
|
You haven't viewed the page yet so you need to go to it and complete the required fields. If you view the page but do not complete the details, the indicator will still disappear if there are no mandatory questions. Validation is not based on whether you complete the fields, just on if you go to the page. It may reappear, however, if you do not complete mandatory questions and in the warning popup you choose OK to continue and lose any data entered into the page. In this case, as no data is saved, the page is still considered "unvisited". |
|
One or more fields on the page are not complete or not correctly completed, as highlighted in the page. Sometimes, this indicator may display when you create a new form, before you have visited a page. This happens when details are pre-populated. For example, your personnel details may be added to the form automatically but there may be associated mandatory fields that need to be completed. |
|
A page that you had previously completed has new or changed elements that you need to review. Return to the page and complete any new questions or fields. If new fields are mandatory, they will be highlighted; if they are not mandatory, look for uncompleted fields. This may be because of an answer you gave to a different question in another page. For example, additional questions may be displayed in the previously completed page. This happens when there is a dependent relationship between questions, which is defined when the form is designed by your administrator. |
|
You only have read only access to the form but one field or more on the page is not complete or not correctly completed; a participant with edit access must resolve the issues |
If View History is selected (Ethics, HDRCM and RPR eForms only): |
|
|
Indicates that the page has details that have changed |
|
Indicates that the page was previously shown but is not currently shown to the user due to visibility conditions
|
This video explains when the different page status indicators display in an eForm.
The View Options button in the right panel of an eForm displays options for viewing information and reports about the open eForm. For details, see: View options and reports for an eForm.
The details entered in the form are automatically saved when you move to the next page. Sometimes, you may need to enter specific details first.
You can also save your work at any time using the Save option in the toolbar panel.
When the system is saving or processing a requested action, a progress spinner displays briefly. You cannot select another action until the process is complete.
Validation is the process of checking the details you entered to make sure that they are correct or in the right format, based on defined rules. Sometimes details are validated immediately when you enter them, while at other times, details are validated when you save or move to another page.
If you can save but there is an issue with what you entered, an error message displays at the top of the page to identify the question you need to address. You can click this message to go to the question in error so you can fix it. In the Page panel to the left, the page will also be marked with a status indicator.
• If you can save but there is an issue with what you entered, an error message displays at the top of the page to identify the question you need to address. You can click this message to go to the question in error so you can fix it. In the Pages panel to the left, the page will also be marked with a status indicator.
• If you can't save, a notification will display to alert you that required questions (marked with a red asterisk) need to be completed first. An option is provided to continue without saving, but you will lose any details you entered in this page since the last time you saved.
The system allows you to display the same eForm in more than one tab in your browser, and for more than one user to access and edit the same eForm. In either case, the system prevents changes from being overwritten. When you save the eForm, the system checks to see if any other changes have been made since you opened it. If no other changes have been made, your changes are saved. If changes have been made either by a concurrent user or by you in another tab, a 'Concurrent User Error' message displays and your changes will not be saved.
As an eForm moves through the process, the details may change. Because of this, when eForms are designed, your administrators may define specific points in the process to take a “picture” of all the details in the form at that time. These static recordings are called "snapshots" which may be available via the View Options button in Toolbar panel at the right of the form (see: View options and reports for an eForm). Your RME administrators determine the points in the process at which snapshots are taken.
For Ethics, Higher Degree Research Candidature Management (HDRCM), and Research Project Request (RPR) eForms, however, you can also view previous details from a snapshot directly within an open eForm.
To view previous details in an Ethics, HDRCM or RPR eForm:
1. In the Toolbar panel, select View History. If this button is not displayed, snapshots are not available for comparison.
2. In the resulting popup, select the radio button for the details you want to compare with the current form details. Choose by date or the name of the snapshot, which may indicate the point in the process that details were recorded. Changes can only be viewed for one snapshot at a time.
3. Click OK. Alternatively, if you don’t wish to proceed, click Close, which closes the popup.
View History results
Differences between the two sets of details
are shown in each page of the eForm. Fields are expanded by default, but
you can hide or show them individually by clicking the Change
toggle ![]() . You can also hide or show all previous values
in the page via the Collapse
All/Expand All link in the Snapshot
title bar.
. You can also hide or show all previous values
in the page via the Collapse
All/Expand All link in the Snapshot
title bar.
• Changes
in fields are marked with the Change
toggle ![]() . Previous field values display below the current
field, marked as Previous Value,
and shaded.
. Previous field values display below the current
field, marked as Previous Value,
and shaded.
• Current fields remain editable, while previous field values are read only.
• In RIC grids, the Change Type column includes the type of change, for example:
• New: A new entry has been added to the RIC since the snapshot was taken. All fields within the RIC item are new, so none are explicitly marked.
• Updated: Details of an entry already in the RIC have been changed. When you open the grid item, fields with different previous details are marked with the Change toggle.
• Removed: An entry has been deleted from the RIC. This shows in a separate grid to the RIC grid. All fields within the RIC item have been removed so none are explicitly marked.
RIC grids generally only show a few columns of data so to see the full extent of changes, select and open the RIC item. To close the RIC item, select the OK button or the cross X at the top right of the RIC item.
• In the Pages panel, each page that has previous values is indicated by an icon, as follows:
• ![]() Page has details that have changed
Page has details that have changed
• ![]() Page was previously visible but is not currently
due to visibility conditions based on responses or the stage of the workflow
of the eForm
Page was previously visible but is not currently
due to visibility conditions based on responses or the stage of the workflow
of the eForm
4. To close all previous details shown in an eForm, click the Close History button in the Toolbar panel.

Click to view or hide: Example of View History in an eForm
• Comments
• View options and reports for an eForm
ID: Use_eForm.htm
