Funding Rules (ReCaP)
In this topic ShowHide
About this page
This page and sub-pages are used by RME administrators to configure
funding rules so that project costing and pricing can be generated using
Research Costing and Pricing (ReCaP).
This page supports ReCaP, available in RME versions since 2018. A new Costing and Pricing Tool was
implemented in version 7.7.0 in mid-2021.
Menu path:
RME menu >
Projects > Funding Rules (ReCaP)
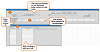
Funding Rules tabs
There are a number of tabs in this Funding Rules page:
• The University Level tab displays
by default and includes all the fields used to set rules for the university
level, including Consumable
and Capital Item groups and items, and the Alert
Definition File
• The
Project Level -Variations tab displays a grid for the project level
rules that have been defined. To add a new one, click New
in the toolbar. The details page will display with relevant fields. See:
Project level -Variations
• The Fund
scheme Level tab displays a grid for fund scheme level rules that
have been defined. To add a new one, click New
in the toolbar. The details page will display with relevant fields. See:
Fund scheme level
• The Pricing
Output Configuration tab displays a grid for pricing outputs that
have been defined. To add a new one, click New
in the toolbar. The details page will display with relevant fields. See:
Pricing Output Configuration
University Level rules
Before using ReCaP, you need to define and set up default funding rules
used by your institution. The institution used in the tool will be the
organisation marked as Primary in the Organisations
page in RME. Some fields in the input pages for your users are sourced
from these default rules, such as percentages for infrastructure cost,
on-cost, contingency and profit.
You can also set the following default options:
• Indicate if
the project is to be invoiced based on milestones - applied to all
projects unless there is a rule variation
• Set custom-defined
activities - applied to all projects unless there is a rule variation
• Set up consumables
and capital items - applied to all projects initially but once you initiate
a costing, changes will not apply for existing costing records. For details,
see: Change funding rules.
To defined university-level rules:
1. From the RME
menu, go to Projects > Funding Rules.
2. Use the following
field table and sections as a guide when configuring your university-level
funding rules.
3. In the toolbar, click Save. To
go back to the previous page, click it in the breadcrumb trail or use
your browser Back button.
University Level: Fields
Consumable
and Capital Items Grouping: Fields
In this section, you can create labels for the different groups of consumables
and capital items, and define items for each group. Some suggested groups
may have been set up for you.
Each group has a separate panel, with a group label and items underneath.
Changes are saved in RME automatically.
• To add a new
group, click the green plus +
icon under the groups panel.
• To add an item
to an existing group, select an item from the list at the far right, then
click the arrow < to the right
of the group label. If you select an item that is not correct for the
group, it will be highlighted. Remove it and select another.

Click to view or hide:
Add an item to a group
Edit existing groups or items
You can also edit groups and items however once you
initiate a costing, changes will not be applied to existing costing records.
See: Change funding rules
• To change a
group label, place your cursor in the field and edit it directly.
• To remove an
item from a group, click the blue cross
X next to it. You cannot re-name items.
• You can hid
and re-display this entire section by clicking the section heading.
Alert Definition File
You can configure and manage specific alert messages to display on the
Output page when specific conditions arise, to notify the chief investigator
or project manager that there are issues to fix.
As a summary, the process involves a defined Excel spreadsheet which
you download from the Funding Rules page (RME >
Projects > Funding Rules). In the pre-defined spreadsheet,
you define the rules and corresponding alert message text, and then upload
back in RME so that the rules can be applied.
Prior knowledge requirements:
This task is intended for those with a good understanding of formulas
in MS Excel. If you’re not sure about using formulas in MS Excel, you
may need to refer to an in-house expert or to Microsoft Excel help online.
The alert spreadsheet has the following main sections:
• Costing
and Pricing Tool Variables: When defining an alert rule, you can
select the cell coordinates from these variables to use in your formula.
To test the rules, you can also enter criteria in these fields. You cannot
edit these fields.
• eForm
Questions: Use this section to include responses to questions or
core fields from an eForm in the formula. For each question or core field
you add, enter the Unique ID.
• Rules:
This is where you set the rule for each alert as a formula, and then define
the corresponding alert text to display.
Click to view or hide:
Alert definition spreadsheet layout
Define a new alert
1. Go to RME > Projects > Funding Rules (ReCaP).
2. In the top
section of the university level rules, click the download link next to
Alert Definition File.
3. Save the resulting
spreadsheet fie to your file system or PC.
4. Open the spreadsheet
and go to the Rules section to
make your changes.
5. In the Rule Name column, enter an easy-to-identify
name for the rule. Example: Uni led contribution > 30%
6. In the Alert messages column, next to the
cell for your formula, enter the text message for the alert. Example:
"Uni is providing cash and in-kind in excess of 30% of the project
cost."
7. In the Formula and resulting alert text
column, define the formula for the alert and save the spreadsheet.
Make sure that your formula references the corresponding alert text from
step 6 (F:#). See tips in
Options for alert formulas.
8. Test
the rule.
9. Save the spreadsheet
file.
10. Upload the
amended Excel spreadsheet in the Funding Rules (ReCaP) page in RME. Use
the Browse button in the Alert Definition File field to find
and upload your saved spreadsheet.
11. Click Save. The
spreadsheet with all the alert rules and text will be saved in the system
and applied. The next time you download the alert definition spreadsheet,
it will contain all the rules you previously defined.
Options for alert formulas
You can construct your formula using either cell coordinates or responses
to eForm questions or core fields.
Edit an existing alert
To change alert text for an existing alert, go to the row for the rule
and in the Alert messages column,
change the text message. Save the file and upload as outlined above in
Define a new alert (from step 10).
To edit an existing rule formula, open the alert definition file from
the Funding Rules (ReCaP) page in RME, change the formula and test
it. Save the file and upload as outlined above in Define
a new alert (from step 10).
Test an alert
You can test an alert rule by entering specific criteria in the Costing and Pricing Tool Variables
section and checking what alert will display in the Formula
and resulting alert text column. Enter data that will deliberately
trigger the alert.
Example: To test the rule ‘Uni led contributions > 30%’, we want
to enter details that will result in a total of cash and in-kind provided
by the university that is more than 30% of the project cost, which should
trigger the alert.
• Project type
= grant
• Total cost
= 500
• Primary fund
organisation eCode = ARC
• Cost to institution
- Cash = 100
• Cost to institution
- In-kind = 250
• DDA: eForm
Questions, ID 10000000001, Response - Yes (in this case, the DDA question
is to determine if the project is university led)
Based on the above data, the alert correctly displays in the Formula
and resulting alert text column. You can continue to enter different data
to see the effects.
Remove an alert
If you want to remove a particular alert, or do not want to use any
alerts, follow these steps:
1. Download the
alert definition spreadsheet, as for steps 1 and 2 in Define
a new alert.
2. Remove the
formulas for the alert rule/s and save the file.
3. Upload the
amended spreadsheet, as outlined above in Define
a new alert (from step 10).
Change funding rules
When you configure funding rules in RME, they are stored as a master
copy in RME. When a costing record is created for a project, the system
determines the applicable rules based on the project details, project
type and fund scheme, as relevant. The rules that are applicable are collated
and copied as a kind of “snapshot” from the RME master and saved as an
internal copy to that individual costing record in ReCaP. The saved internal
rules are then used for all costing and pricing calculations for that
project.
Once a costing has been initiated for an existing project in ReCaP,
changes to the master funding rules in RME are not updated in the internal
copy in the record unless either the Project
Type or Primary Fund Scheme
has been changed in RME. This is because different funding rules may have
been defined for project types or fund schemes, so a different combination
of rules may now apply.
• If either of
these RME fields is changed, internal funding rules are updated and changes
are applied to all existing records, except for changes to Consumable
and Capital Items. Changes to the configuration of the Consumable and
Capital Items in RME (rename a group, add a new group or item, delete
a group or item) will not be updated for existing costing records in ReCaP.
• If there are
no changes to these RME fields, changed funding rules will only be applied
to new project records in ReCaP.
Rule precedence
When rule variations are set for project types or fund schemes, they
may override university level rules. As a guide, refer to the table below
to determine which rule may apply in certain situations:
Related topics
• Research
Costing and Pricing overview
• Project
level variations
• Fund
scheme level rules
• Salary
Rates
• Pricing
Output Configuration
Product key:
Research Costing and Pricing
Page ID: CNP001.htm